2set Temperature Controller Module with Case, XH W1209 LED Display Digital Thermostat Module with Waterproof NTC Probe

$19.074

SKU: 3256808503411877

描述

  • Hign-concerned Chemical: None
  • Package: TQFP
  • Dissipation Power: N/A
  • Supply Voltage: N/A
  • Application: Computer
  • Type: Module
  • Origin: Mainland China
  • Condition: New
  • Operating Temperature: N/A
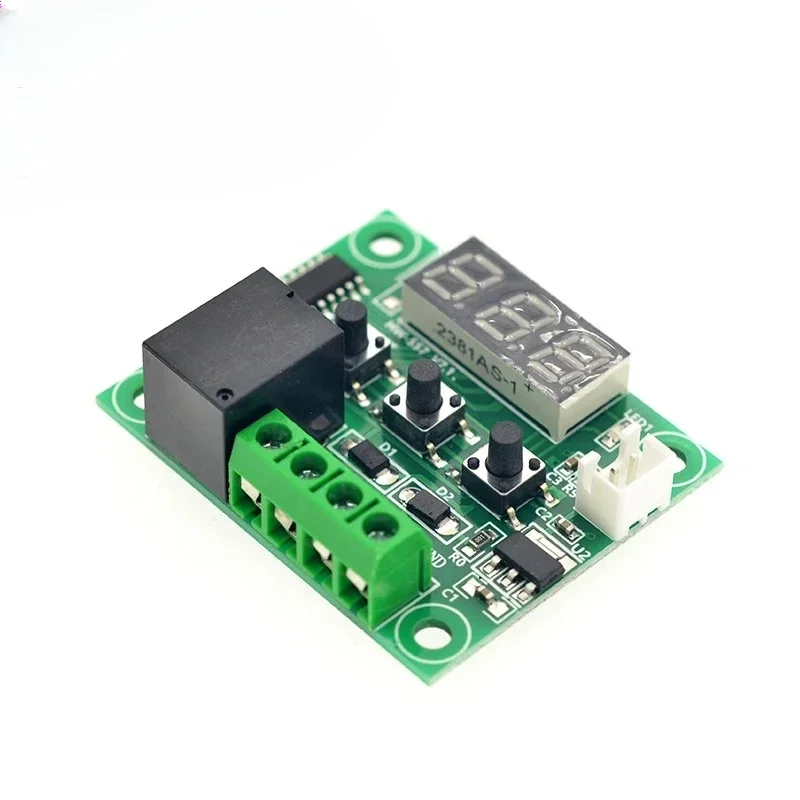
W1209 Features:

1. 100% complete machine patch, wave soldering, stable performance, good consistency 2. Embedded central processing unit chip (MCU), more intelligent, lower power consumption >4, the control accuracy is 0.1 degrees Celsius


5. The hysteresis can be set from 0.1, and the decimal can be controlled (0.1-15.0)

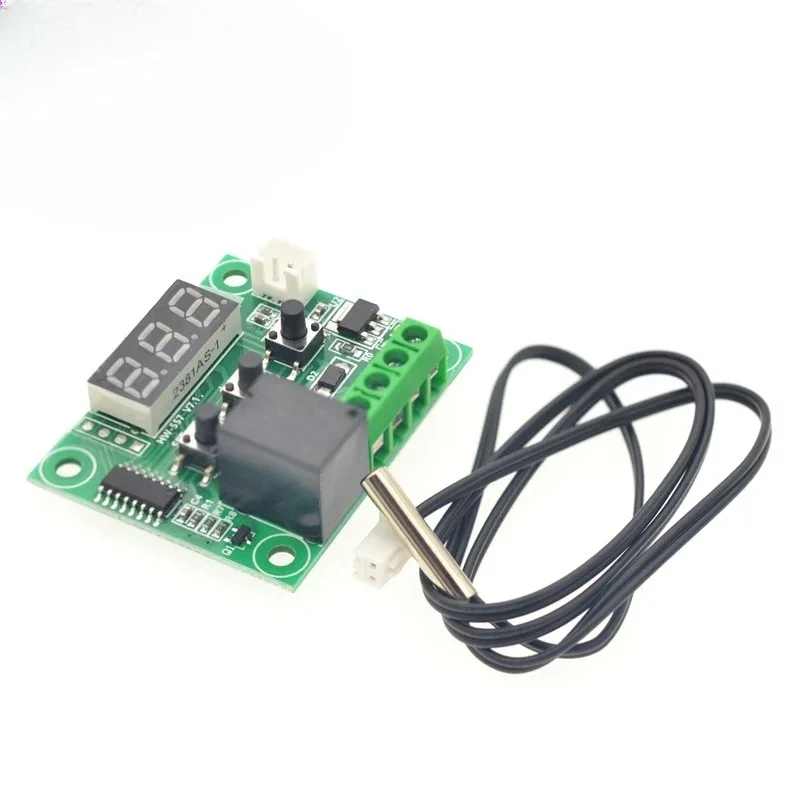
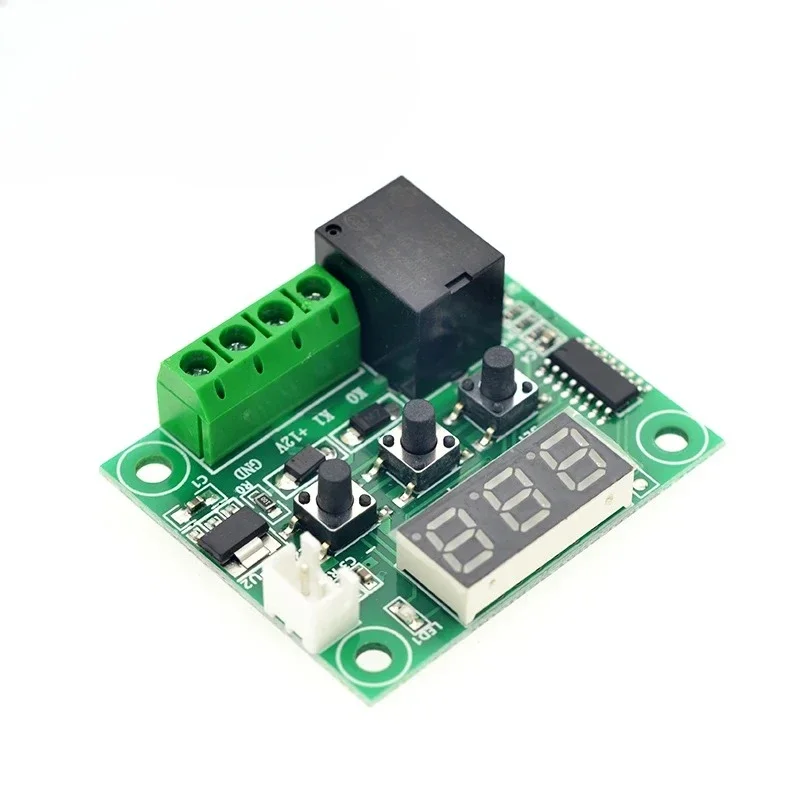
W1209 Product parameters:

product name:

Digital display intelligent thermostat

Input power:

DC12V

Temperature control range:

-50~110

Measurement input:

NTC ( 10K 0.5% )

Waterproof sensor

Temperature measurement accuracy:

0.1

output range;

1 channel 10A relay

Refresh rate:

0.5S

Hysteresis accuracy:

0.1

model:

XH-W1209

Environmental requirements:

-10~60 Humidity 20%-85%

size:

48.5*40.1*15.8mm

Machine power consumption:

Quiescent current: 35MA

Pick-up current: 65MA

net weight:

22.3g

Display Type:

0.28 inch three-digit digital tube

High temperature protection:

0~110

Resolution:

-9.9~99.9 0.1°C other temperature range 1°C

 
Instructions:
After connecting the power supply and equipment, you can supply power to the controller. At this time, the display shows the measured temperature. Press the SET button once, and the temperature on the display will flash. Press 11 to set the desired temperature (press and hold 11 to quickly rise and fall) Set After completion, press SET to confirm and return. At this time, the controller automatically executes the relay on and off according to the setting! The output of the thermostat is 20A relay, which can meet various high-power loads. After connecting the control circuit, the thermostat can be powered. This When the display shows the ambient temperature,
 
Status description of indicator light, nixie tube and buzzer:
Indicator light: flashing means cooling or heating start delay, steady light means the relay is closed
Digital tube: display LL means the sensor is open circuit, please connect the sensor according to the instructions; display H means beyond the measuring range, the thermostat will forcibly disconnect the relay; display — means high temperature alarm
 
Parameter function description
Press and hold SET for 5 seconds to enter the main menu setting, press +1 to switch P0..P6, long press SET or no button action for 10 seconds, the controller will automatically confirm and return.
P0 cooling, heating mode:
Press and hold SET for 5 seconds to display PO, press SET once to set the working mode, press 11 to switch [H is heating mode] [C is cooling mode] Press SET once to return, long press SET or no button action for 10 seconds, the controller automatically confirms completion .
In cooling mode: when the temperature measurement value ≥ the temperature set point, the refrigeration relay is closed and the refrigerator starts; when the temperature measurement value ≤ temperature set point – hysteresis, the refrigeration relay is disconnected,
The refrigerator is off.
In heating mode: when the temperature measurement value is less than or equal to the temperature set point, the heating relay is closed and the heater is started; when the temperature measurement value is greater than or equal to the temperature set point + hysteresis, the heating relay is disconnected
Heater is off.
P1 Hysteresis Setting:
Press and hold SET for 5 seconds to display PO, press 11 to switch to P1, press SET once to set the hysteresis value, press 11 to set the hysteresis to 0.1-15, press SET once to return after completion, long press SET or no button for 10 seconds The motion controller automatically confirms completion.
In cooling mode: when the temperature measurement value is greater than or equal to the set value, the relay is closed and the refrigerator is started; when the temperature measurement value is less than or equal to the set value – the hysteresis value, the relay is disconnected and the refrigerator is turned off.
For example, the environment is 30C, the set value is 25% ℃, and the hysteresis is set to 2C. After the power is turned on, the relay closes and the refrigerator starts. When the cooling reaches 23C, the relay disconnects and the refrigerator is turned off. At this time, the refrigerator has been disconnected. The temperature starts to rise. When it rises to the set value of 25°C, the relay closes and the refrigerator starts again, and the temperature is controlled to be no higher than 25°C through repeated cycles.
In heating mode: when the temperature measurement value is less than or equal to the set value, the relay is closed and the heater is started; when the temperature measurement value is greater than or equal to the set value + hysteresis value, the relay is disconnected and the heater is turned off.
For example, the environment is 10°C, the set value is 25%C, and the hysteresis is set to 2C. After the power is turned on, the relay closes the heater and starts. When the temperature reaches 27C, the relay turns off the heater and turns off. The open temperature begins to drop, and when it drops to the set value of 25°C, the relay closes the heater and starts again, and the repeated cycle controls the temperature not to be lower than 25°C.
P2 maximum temperature setting upper limit:
In order to avoid the danger that the set temperature is too high due to misoperation by others, this thermostat has the highest setting upper limit function, which limits the setting range of the highest temperature set point controlled by the thermostat.
Press and hold SET for 5 seconds to display PO, press 11 to switch to P2, press SET once to set the upper limit, press +1 to set the highest temperature that can be set, the maximum value is 110, after finishing, press SET once to return, long press SET or 10 seconds The controller automatically confirms the completion when there is no key-press action on the clock.
For example: if the temperature set point is set to 60, the maximum can only be set to 60°C. If the temperature set point is to be higher and the temperature range is to be expanded, the set value of the upper limit needs to be adjusted first.
P3 minimum temperature setting lower limit:
In order to avoid the temperature being too low and ice blocking due to misoperation by others, this thermostat has the function of the minimum setting upper and lower limit, which limits the setting range of the minimum temperature set point controlled by the thermostat.
Press and hold SET for 5 seconds to display PO, press 11 to switch to P3, press SET once to set the minimum and lower limit, press 11 to set the lowest temperature that can be set, the minimum value is -50, after finishing, press SET once to return, long press SET or 10 The controller automatically confirms the completion if there is no button action in seconds.
For example: if the temperature set point is set to 2, the minimum can only be set to 2°C. If you want to expand the temperature range with a lower temperature set point, you need to adjust the set value of the lower limit first.
P4 temperature correction:
When there is a deviation between the measured temperature and the standard temperature or due to the special needs of the user’s hardware, this function can be used to calibrate, the calibrated temperature = the temperature before calibration + the effective range of the calibration value is -7.0~7.0. Press and hold SET for 5 seconds to display PO , press 11 to switch to P4, press SET once to calibrate, press 11 to set the correction value, press SET once to return after completion, long press SET or no button action for 10 seconds, the controller automatically confirms the completion.
For example, the normal display is 25 degrees; when the temperature correction is O, it displays 25 degrees; when the temperature correction is 1.5, it displays 26.5 degrees; when the temperature correction is -1.5, it displays 23.5.

P5 delay start time (unit: minutes):

When there is a need for a delay in the work of the refrigerator or heater, the delay function can be turned on to protect the life of the equipment.

Press and hold SET for 5 seconds to display PO, press 11 to switch to P5, press SET once to set the delay start time unit is minutes, press 11 to set 0-10 minutes, press SET once to return after completion, long press SET or 10 seconds No button action controller automatically confirms completion

In cooling mode: when the power is turned on for the first time, if the current temperature is greater than or equal to the set value, the refrigerator will not start cooling immediately, and it needs to start after the set delay time. In heating mode: when the power is turned on for the first time, if the current temperature is less than or equal to the set value, the heater will not start heating immediately, it needs to run after the set delay time. When the stop time between two consecutive starts of the refrigerator or heater is greater than the set value of the delayed start time, the refrigerator will start immediately.

When the stop time interval between two consecutive starts of the refrigerator or heater is less than the set value of the delay start time, the equipment can only be started after the set delay start time of the refrigerator has been run to start again. The delay time is calculated from the moment of shutdown.

For example, in the cooling state, set the delay to 5 minutes. After the start of the refrigerator, the delay of the start of the refrigerator will be delayed. After 5 minutes, the refrigerator will be turned on. When the required temperature is reached, the refrigerator will stop, and the timer will start at this time. Work, if the timing is not completed, it will not work until the timing is over, and the LED indicator flashes during the delay.

When the delay start is set to 0, it is equal to turn off the delay function.

reset:

Due to some artificial reasons, the internal settings of the thermostat are chaotic. It takes time to set each item. At this time, you can use this function to restore the factory settings. Then turn it on, and all the above parameters will be restored to the factory setting


评价

目前还没有评价

成为第一个“2set Temperature Controller Module with Case, XH W1209 LED Display Digital Thermostat Module with Waterproof NTC Probe” 的评价者

您的邮箱地址不会被公开。 必填项已用 * 标注