
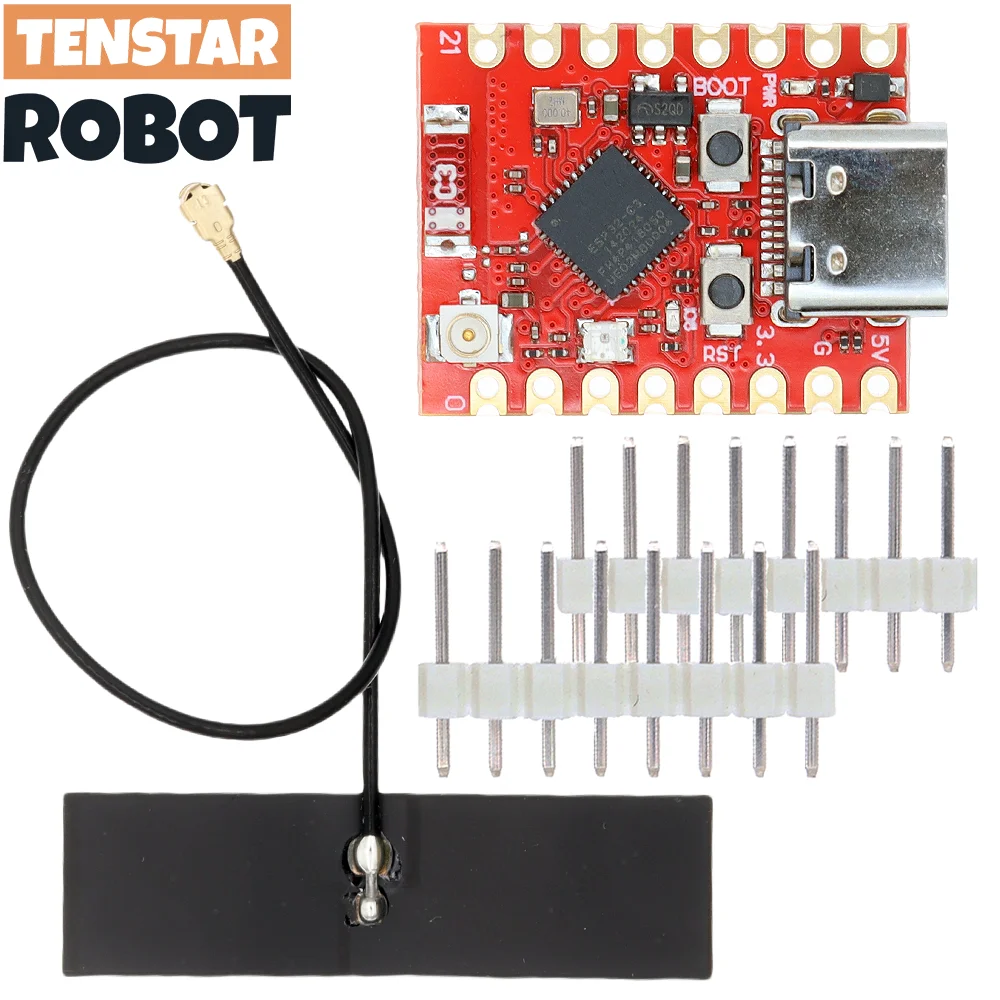
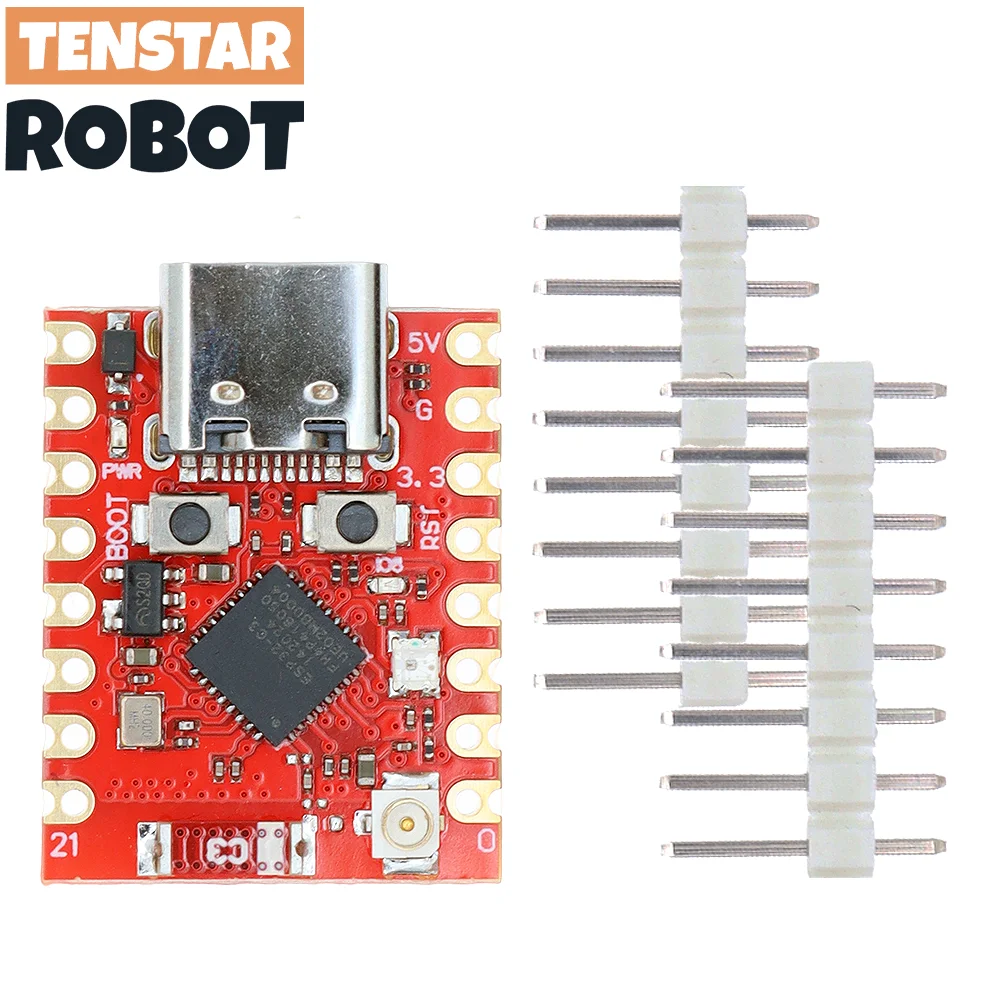

描述
- Quantity: 1
- Hign-concerned Chemical: None
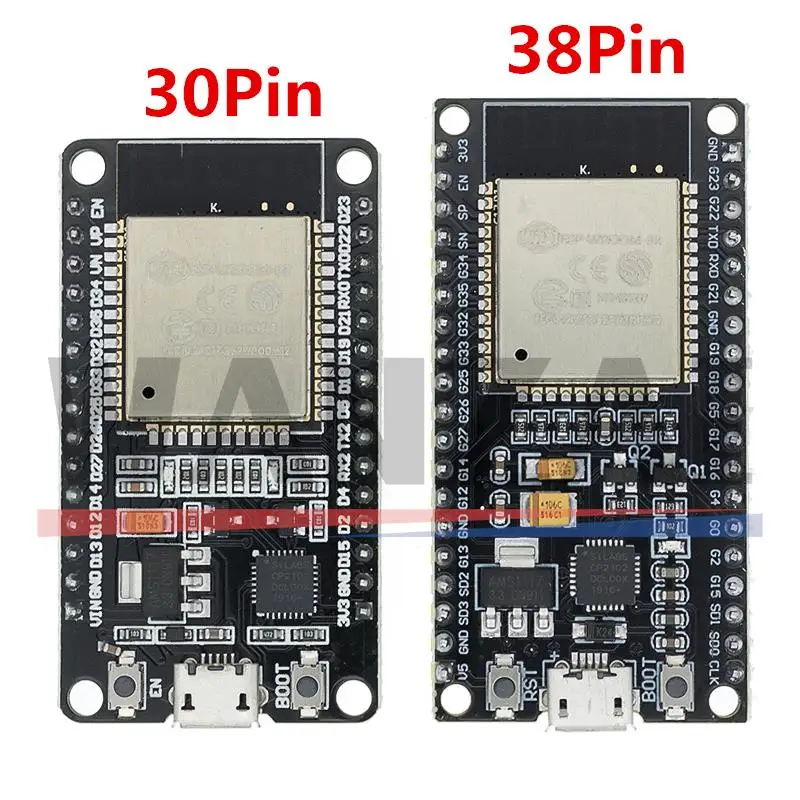
- Package: DIP
- is_customized: Yes
- Dissipation Power: 1
- Supply Voltage: 5V
- Application: Computer
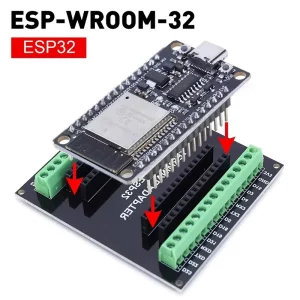
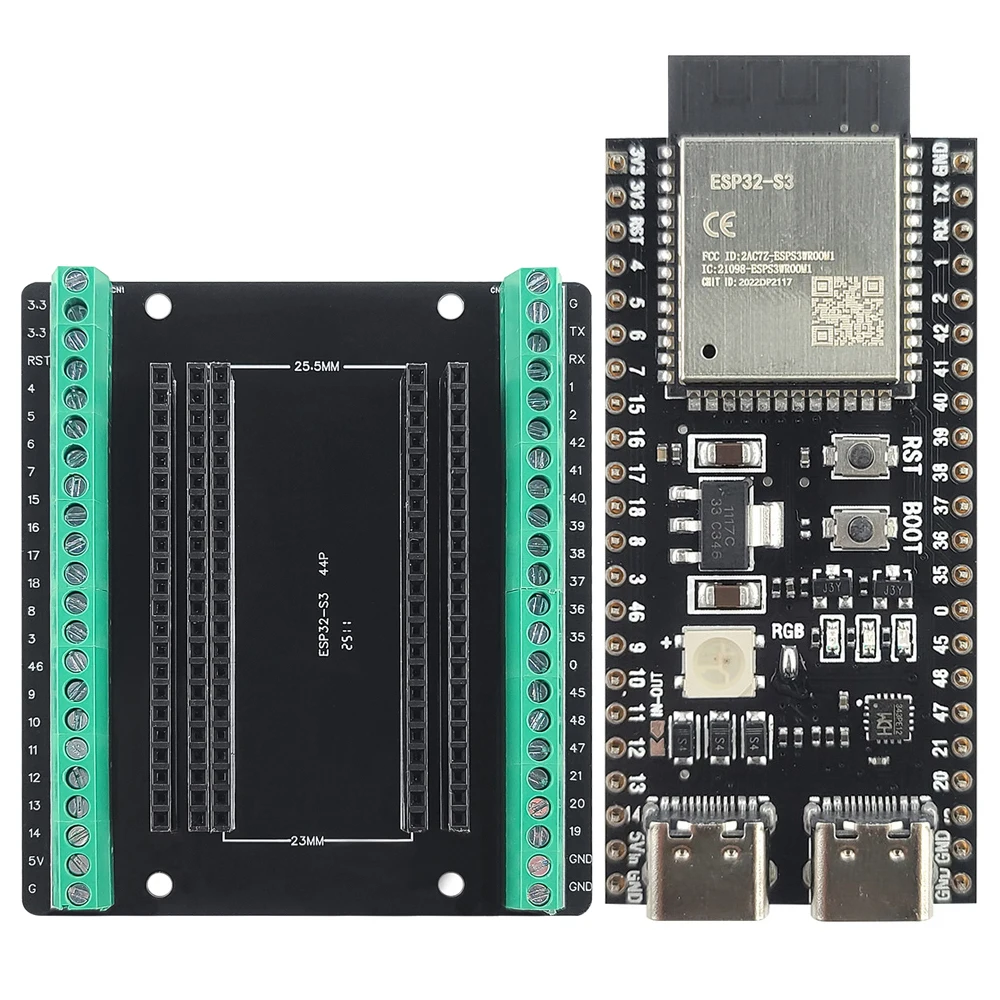
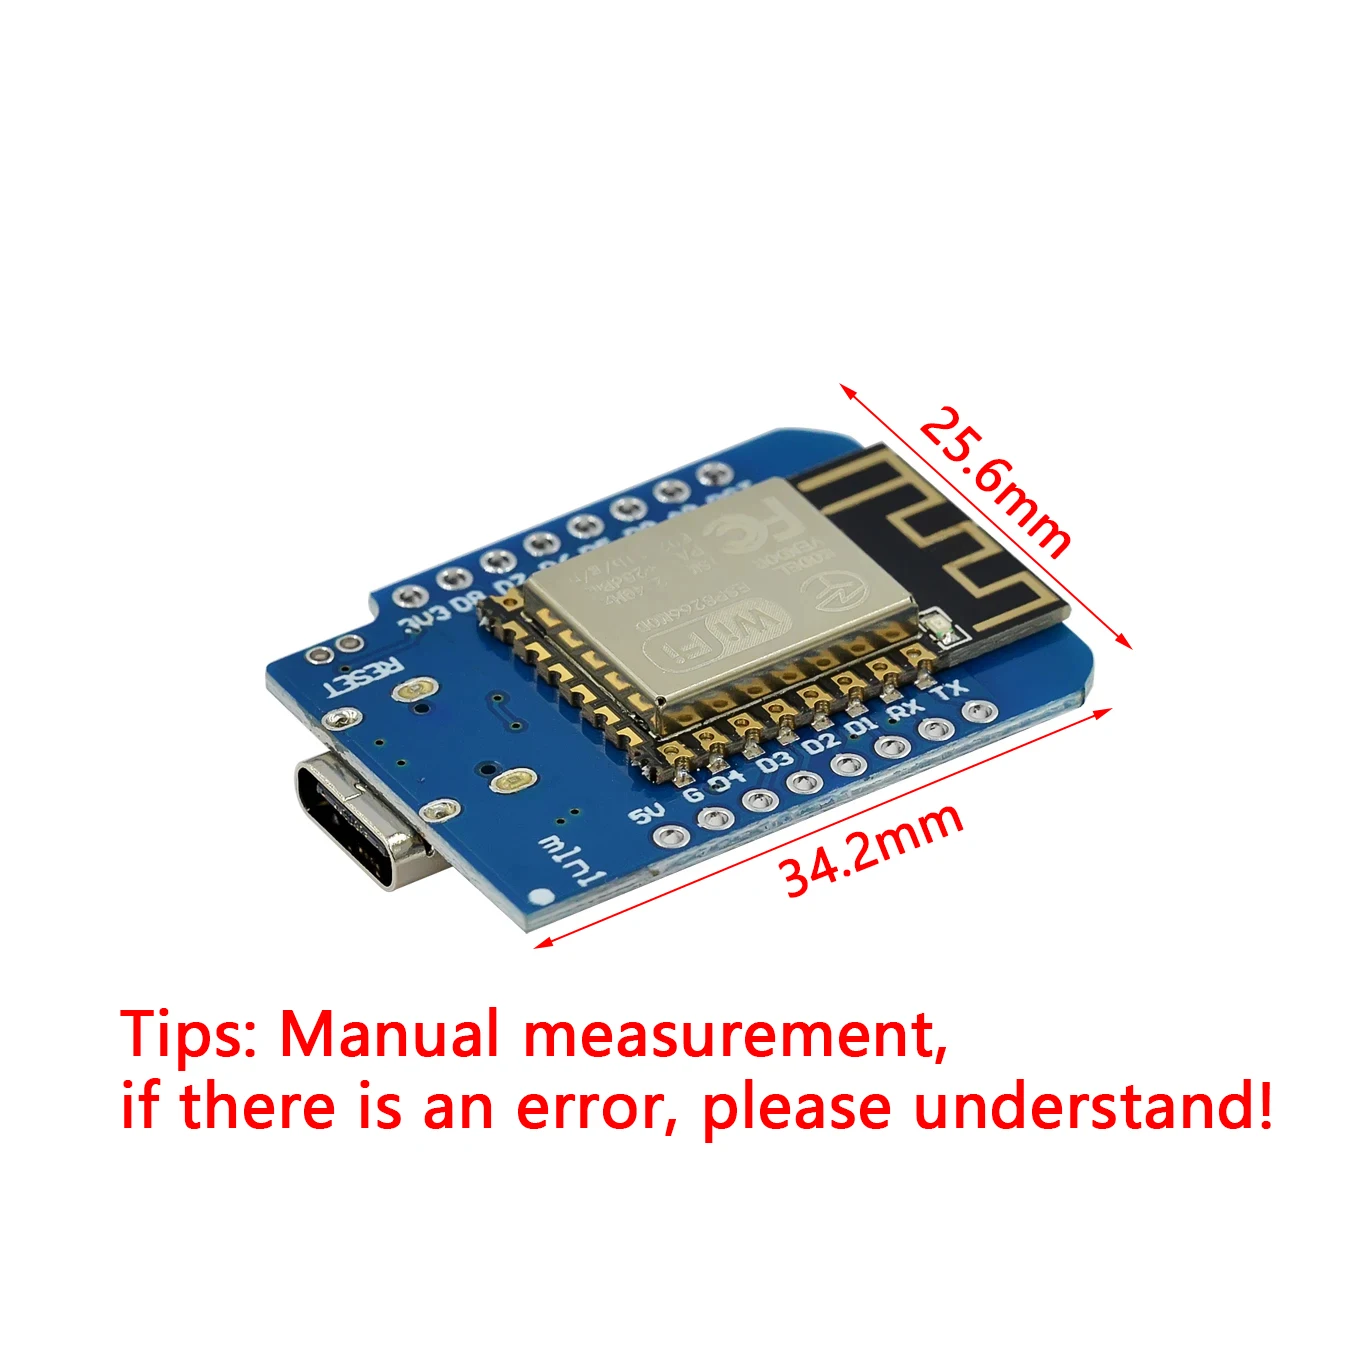
- Type: Module
- Brand Name: TENSTAR ROBOT
- Origin: Mainland China
- Condition: New
- Operating Temperature: -30+50
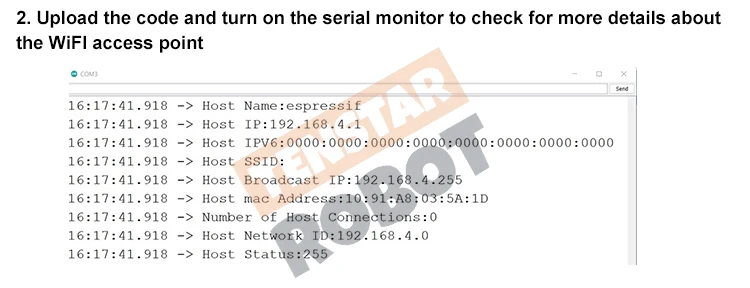
#include “WiFi.h”
void setup()
{
Serial.begin(115200);
WiFi.softAP(“ESP_AP”, “123456789”);
}
void loop()
{
Serial.print(“Host Name:”);
Serial.println(WiFi.softAPgetHostname());
Serial.print(“Host IP:”);
Serial.println(WiFi.softAPIP());
Serial.print(“Host IPV6:”);
Serial.println(WiFi.softAPIPv6());
Serial.print(“Host SSID:”);
Serial.println(WiFi.SSID());
Serial.print(“Host Broadcast IP:”);
Serial.println(WiFi.softAPBroadcastIP());
Serial.print(“Host mac Address:”);
Serial.println(WiFi.softAPmacAddress());
Serial.print(“Number of Host Connections:”);
Serial.println(WiFi.softAPgetStationNum());
Serial.print(“Host Network ID:”);
Serial.println(WiFi.softAPNetworkID());
Serial.print(“Host Status:”);
Serial.println(WiFi.status());
delay(1000);
}

#include
#include
#include
#include
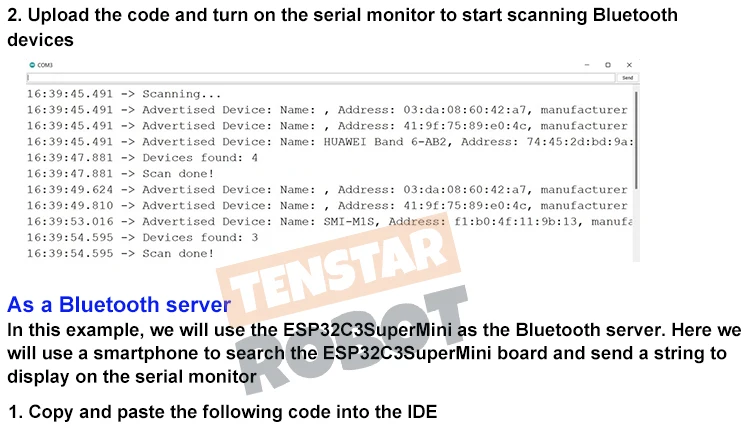
int scanTime = 5; //In seconds
BLEScan* pBLEScan;
class MyAdvertisedDeviceCallbacks: public BLEAdvertisedDeviceCallbacks {
void onResult(BLEAdvertisedDevice advertisedDevice) {
Serial.printf(“Advertised Device: %s n”, advertisedDevice.toString().c_str());
}
};
void setup() {
Serial.begin(115200);
Serial.println(“Scanning…”);
BLEDevice::init(“”);
pBLEScan = BLEDevice::getScan(); //create new scan
pBLEScan->setAdvertisedDeviceCallbacks(new MyAdvertisedDeviceCallbacks());
pBLEScan->setActiveScan(true); //active scan uses more power, but get results faster
pBLEScan->setInterval(100);
pBLEScan->setWindow(99); // less or equal setInterval value
}
void loop() {
// put your main code here, to run repeatedly:
BLEScanResults foundDevices = pBLEScan->start(scanTime, false);
Serial.print(“Devices found: “);
Serial.println(foundDevices.getCount());
Serial.println(“Scan done!”);
pBLEScan->clearResults(); // delete results fromBLEScan buffer to release memory
delay(2000);
}
#include
#include
#include
// See the following for generating UUIDs:
// https://www.uuidgenerator.net/
#define SERVICE_UUID “4fafc201-1fb5-459e-8fcc-c5c9c331914b”
#define CHARACTERISTIC_UUID “beb5483e-36e1-4688-b7f5-ea07361b26a8”
class MyCallbacks: public BLECharacteristicCallbacks {
void onWrite(BLECharacteristic *pCharacteristic) {
std::string value = pCharacteristic->getValue();
if (value.length() > 0) {
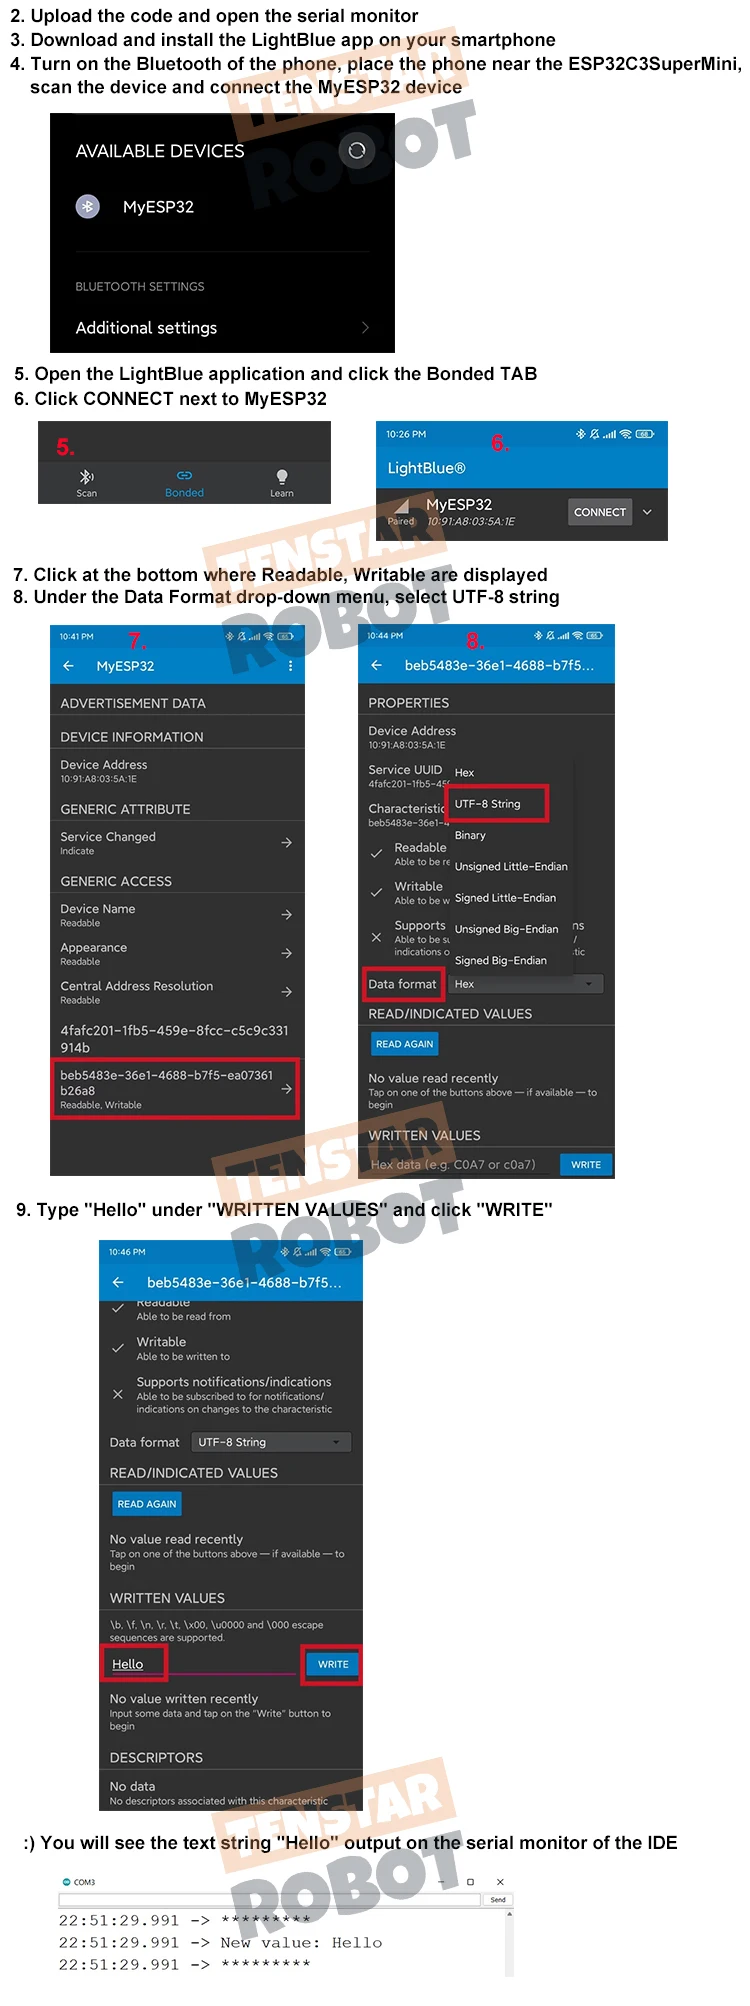
Serial.println(“*********”);
Serial.print(“New value: “);
for (int i = 0; i < value.length(); i++)
Serial.print(value[i]);
Serial.println();
Serial.println(“*********”);
}
}
};
void setup() {
Serial.begin(115200);
BLEDevice::init(“MyESP32”);
BLEServer *pServer = BLEDevice::createServer();
BLEService *pService = pServer->createService(SERVICE_UUID);
BLECharacteristic *pCharacteristic = pService->createCharacteristic(
CHARACTERISTIC_UUID,
BLECharacteristic::PROPERTY_READ |
BLECharacteristic::PROPERTY_WRITE
);
pCharacteristic->setCallbacks(new MyCallbacks());
pCharacteristic->setValue(“Hello World”);
pService->start();
BLEAdvertising *pAdvertising = pServer->getAdvertising();
pAdvertising->start();
}
void loop() {
// put your main code here, to run repeatedly:
delay(2000);
}
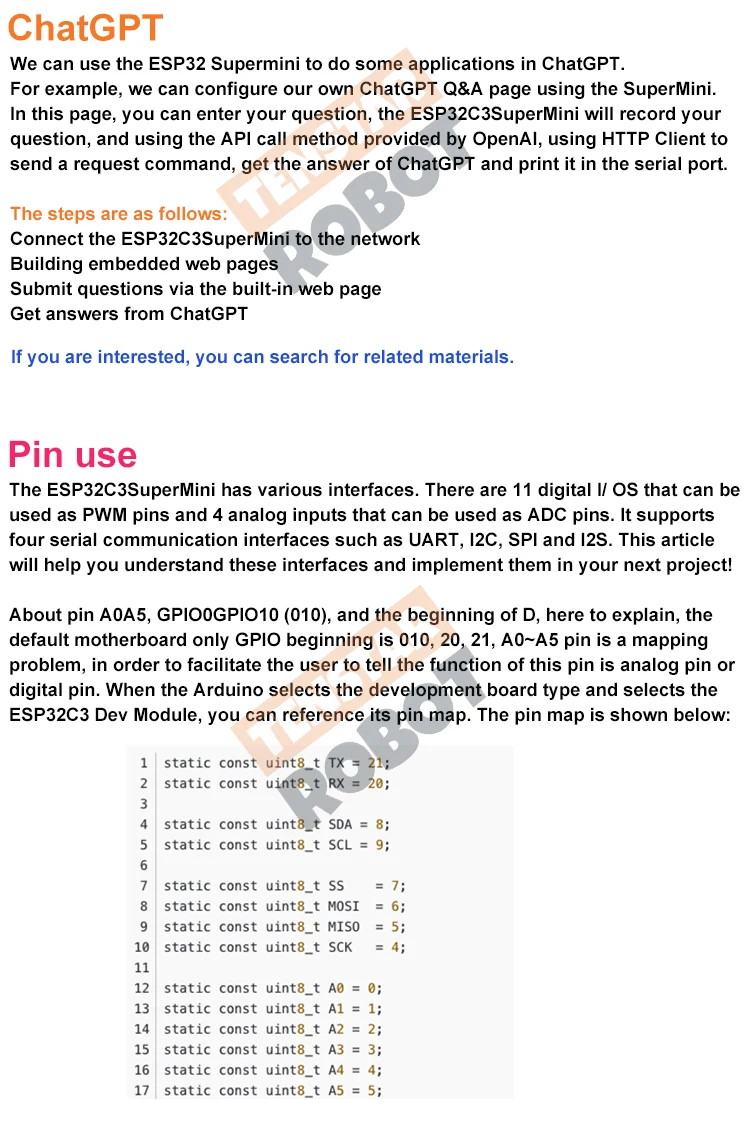
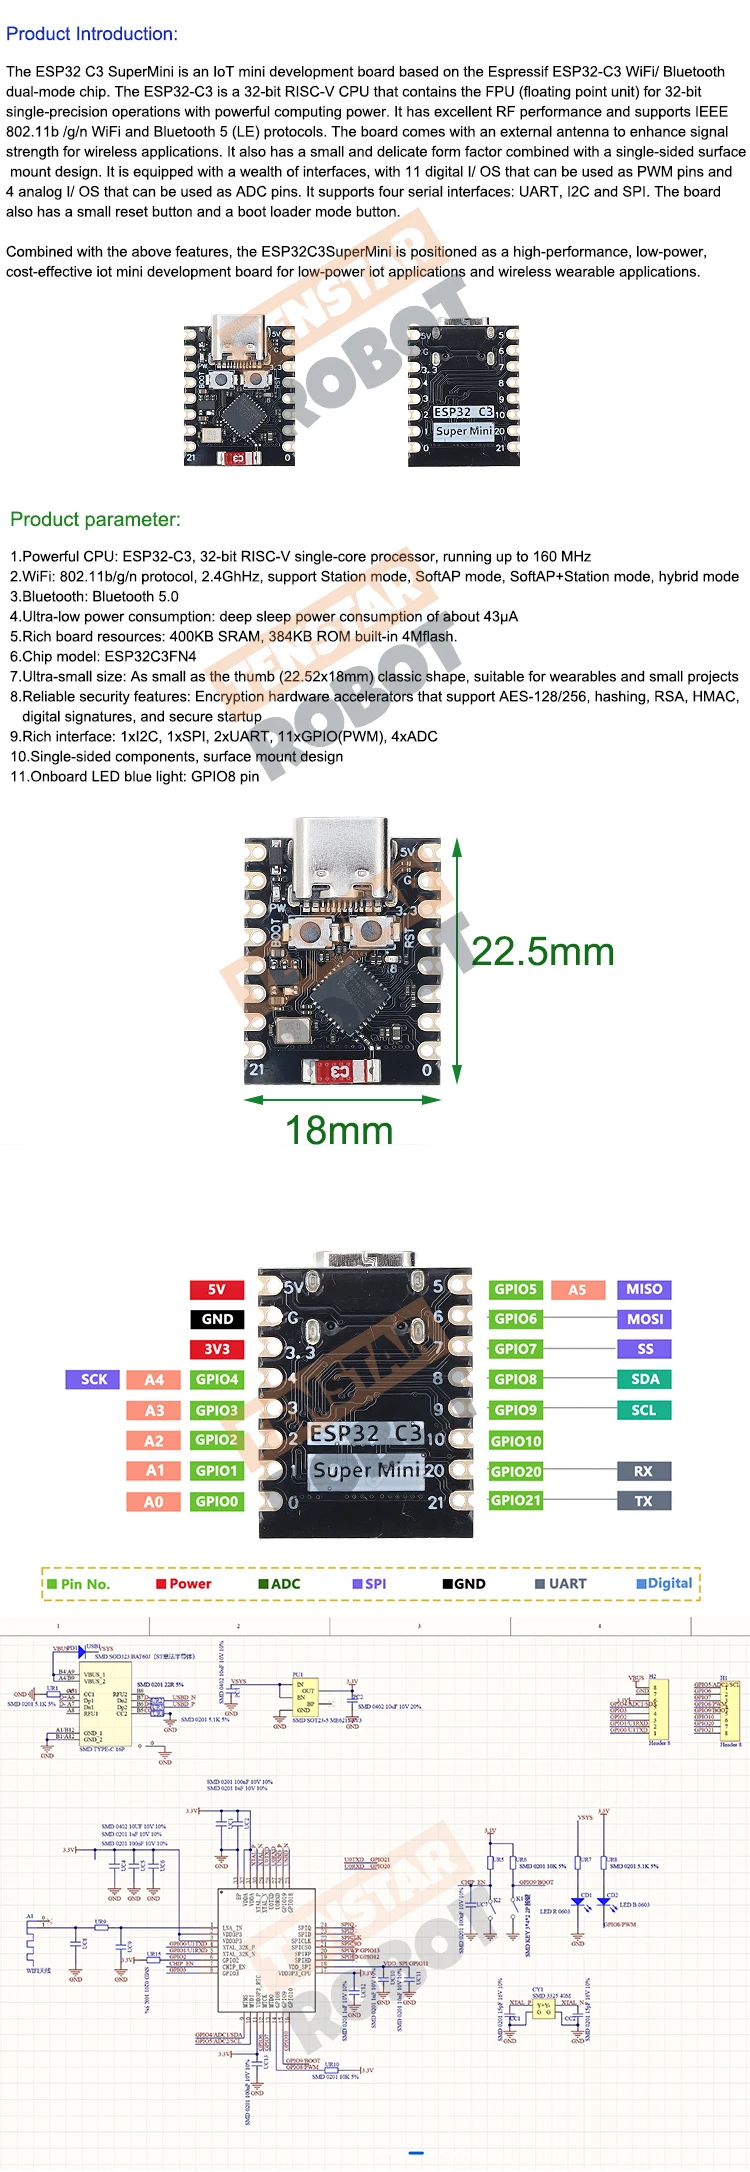
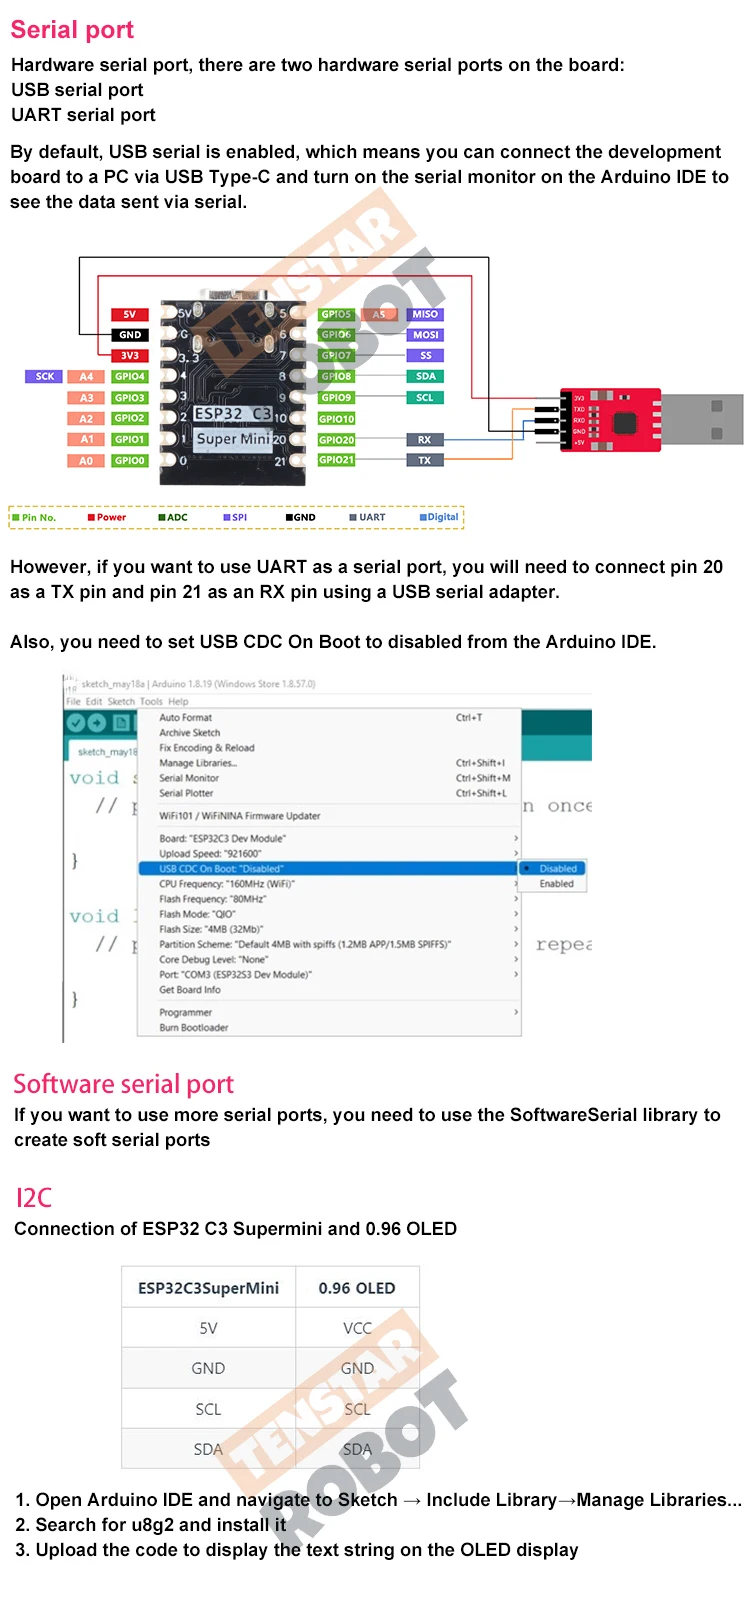
Digital pin
Upload the code to the board, and the on-board LED will light up every second.
// define led according to pin diagram
int led = 8;
void setup() {
// initialize digital pin led as an output
pinMode(led, OUTPUT);
}
void loop() {
digitalWrite(led, HIGH); // turn the LED on
delay(1000); // wait for a second
digitalWrite(led, LOW); // turn the LED off
delay(1000); // wait for a second
}
Digital PWM
Upload the following code to see the on-board LED gradually dim.
int ledPin = 8; // LED connected to digital pin 10
void setup() {
// declaring LED pin as output
pinMode(ledPin, OUTPUT);
}
void loop() {
// fade in from min to max in increments of 5 points:
for (int fadeValue = 0 ; fadeValue <= 255; fadeValue += 5) {
// sets the value (range from 0 to 255):
analogWrite(ledPin, fadeValue);
// wait for 30 milliseconds to see the dimming effect
delay(30);
}
// fade out from max to min in increments of 5 points:
for (int fadeValue = 255 ; fadeValue >= 0; fadeValue -= 5) {
// sets the value (range from 0 to 255):
analogWrite(ledPin, fadeValue);
// wait for 30 milliseconds to see the dimming effect
delay(30);
}
}
Analog pin
Connect the potentiometer to pin A5 and upload the following code to control the flashing interval of the LED by turning the potentiometer knob.
const int sensorPin = A5;
const int ledPin = 8;
void setup() {
pinMode(sensorPin, INPUT); // declare the sensorPin as an INPUT
pinMode(ledPin, OUTPUT); // declare the ledPin as an OUTPUT
}
void loop() {
// read the value from the sensor:
int sensorValue = analogRead(sensorPin);
// turn the ledPin on
digitalWrite(ledPin, HIGH);
// stop the program for
delay(sensorValue);
// turn the ledPin off:
digitalWrite(ledPin, LOW);
// stop the program for for
delay(sensorValue);
}


评价
目前还没有评价